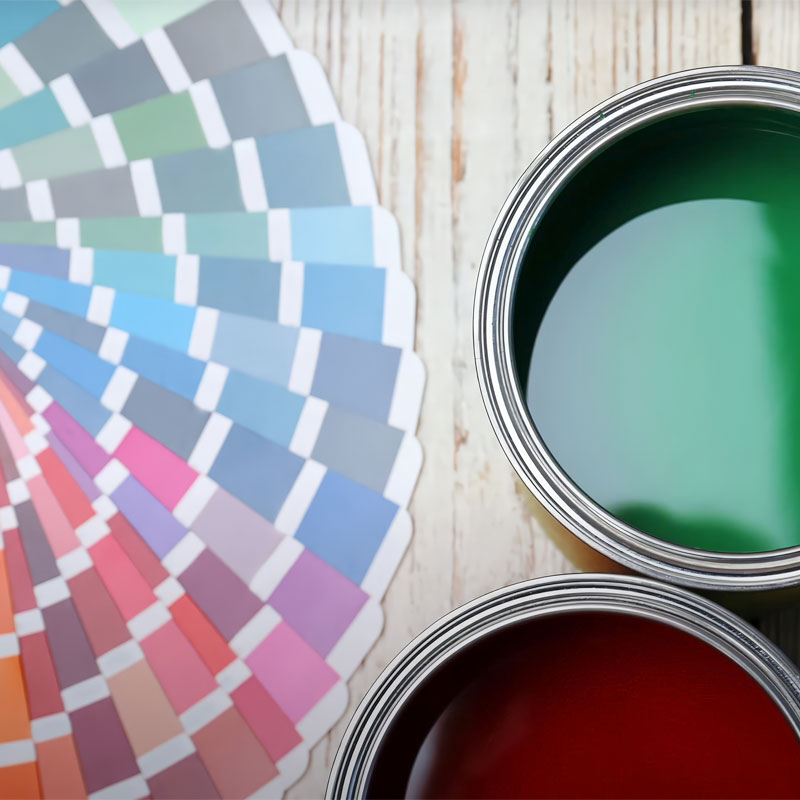
After spending over two decades transforming countless homes with the power of paint, I’ve learned that the difference between a mediocre paint job and a masterpiece lies in the details. Today, I’m sharing my professional insights to help you achieve results that would make any professional painter proud.
Expert Advice from a Professional Painter: A Quick Guide to Interior Painting
Let me tell you something that might surprise you: the actual interior painting only accounts for about 40% of a professional paint job. The real magic happens during preparation. I’ve seen countless DIY projects go wrong simply because people rush to get to the “fun part” of applying paint.
First things first – you need to create an ideal workspace. Here’s my tried-and-true approach:
Setting Up Your Workspace Like Professional Painters
Wall Preparation: A Professional Painter’s Approach
I can’t stress this enough – proper wall preparation determines 80% of your paint job’s success. Start with a thorough inspection: run your hand over the walls to feel for rough spots and shine a bright light across the surface at an angle to spot imperfections.
Clean the walls methodically – for regular rooms, warm water with a mild detergent works well, but kitchens need a degreaser, and bathrooms require a mold-killing solution. For stubborn stains, I use TSP (trisodium phosphate) – a heavy-duty cleaner available at any hardware store or paint shop in the cleaning supplies section. But be careful with it – always wear rubber gloves and protective eyewear, and ensure good ventilation.
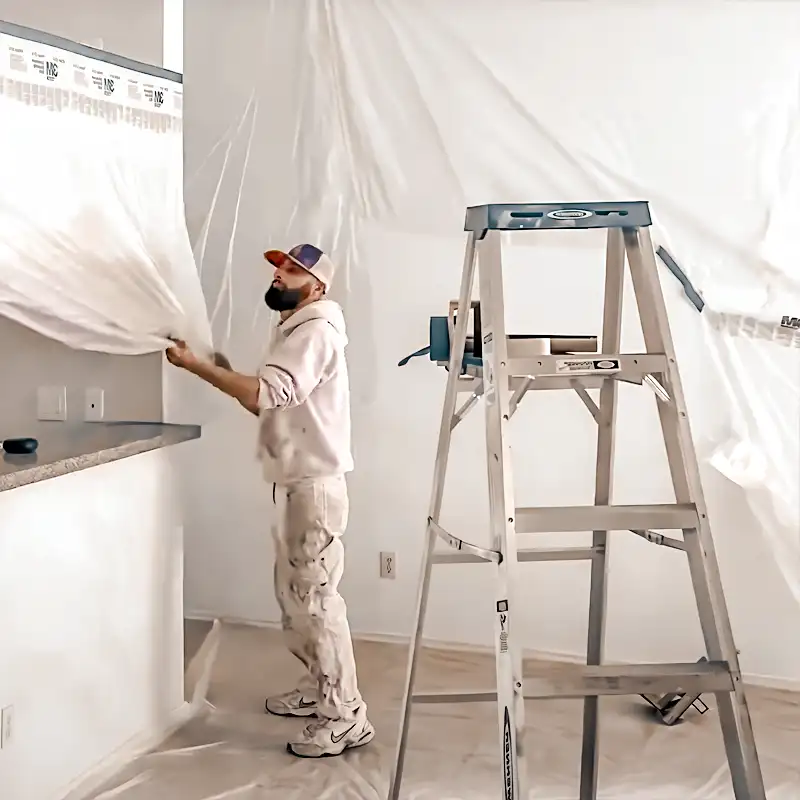
While it might be tempting to just cover everything with plastic tint, I only use it for protecting furniture and wall sections. For floors, I always choose either canvas drop cloths or builder’s paper. Here’s why: they’re more durable, stay in place better, and — this is crucial — they don’t create a slipping hazard like plastic does. Trust me, the last thing you want is to do an impromptu dance routine while holding a paint bucket!
After cleaning, don’t rush – let the walls dry completely, ideally overnight. Trust me, I’ve seen countless paint jobs fail because people hurried this crucial step.
Pro Tip: Dealing with Surface Issue
Even tiny imperfections will show up under fresh paint, and believe me, they’ll be more noticeable than before. Here’s my time-tested approach: first, do the “touch test” – run your hands over the walls and mark problem spots with blue painter’s tape (I prefer it over masking tape as it’s easier to remove).
To fill gaps around the trim, start by cutting the tip of the caulk tube near the top to create a small opening. Apply a thin bead of caulk by pressing down on the trigger and pulling the caulk gun toward you as you move along the gap. Once the caulk is applied, use a wet finger to smooth it out for a clean finish.
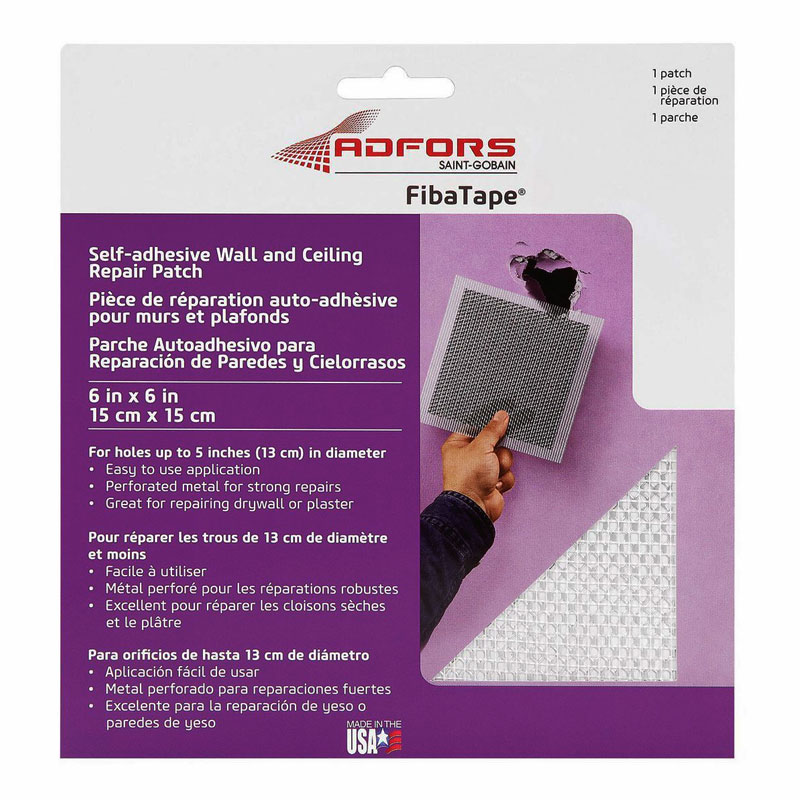
For nail holes and small dents up to ¼ inch, use lightweight spackling compound – it dries faster and shrinks less. For holes up to 2 inches I use self-adhesive mesh tape and standard spackling compound, and for anything larger from 2 to 8 inches I recommend using the Wall Repair Patch Kit.
Here’s a pro tip: always apply in thin layers – I’ve seen countless DIYers try to fill holes in one go, only to end up with shrinkage and cracks. Let each layer dry completely (check the compound’s instructions for drying time), then lightly sand between coats with 150-grit sandpaper, finishing with 220-grit for that smooth-as-glass feel. Don’t forget to wipe away the dust with a slightly damp cloth before painting.
Primer Selection: What Professional Painters Use
When to Prime
Not every painting project requires primer. Skip it when:
- Repainting walls in good condition
- Using the same type of paint
- Making minimal color changes
- Working with recently painted surfaces (less than 3 years old)
However, primer is essential when dealing with:
- New drywall or fresh plaster
- Major color changes (especially light over dark)
- Damaged or deteriorated surfaces
- Porous materials
- Glossy or slick surfaces
- Stained surfaces
- Areas with water damage
Choosing the Best Primer
Different surfaces require specific primers for optimal results. Here’s my surface-by-surface guide based on decades of experience:
Interior Walls
- Best Choice: Water-based, 100% latex primer
- Why: Provides good adhesion and quick drying time
- Pro Tip: For dramatic color changes, have your paint store tint the primer to match your final color – this can reduce the number of topcoats needed
Bare Wood Trim
- Best Choice: Oil-based primer
- Why: Penetrates wood pores deeply, creating an excellent foundation
- Pro Tip: Apply with natural bristle brush for best results and sand lightly between coats
Previously Painted Wood Trim
- For latex-painted trim: Water-based latex primer
- For unknown paint type: Oil-based primer as a safe bet
- Pro Tip: Test a small area first – if the primer peels or bubbles, switch to oil-based
Clear-Coated Wood (Polyurethane/Varnish)
- Best Choice: Shellac primer
- Why: Superior adhesion and stain-blocking properties
- Safety Note: Use in well-ventilated areas and wear appropriate respiratory protection
MDF (Medium-Density Fiberboard)
- Best Choice: Shellac or oil-based primer
- Why: Prevents material swelling and deterioration
- Warning: Avoid water-based primers as they can damage MDF
Masonry Surfaces
- Best Choice: Water-based masonry primer
- Why: Specifically formulated to seal porous surfaces
- Pro Tip: Allow proper drying time – masonry primers often need 24+ hours
Metal Surfaces
For Ferrous Metals (containing iron):
- Use oil-based rust-inhibiting primer
- Apply two thin coats rather than one thick coat
For Non-Ferrous Metals:
- Use water-based latex metal primer
- Ensure surface is completely clean before application
Plastic and Laminate
- Best Choice: Bonding primer
- Why: Specially modified acrylic formula for slick surfaces
- Pro Tip: Light sanding before priming increases adhesion
Professional Secrets for Perfect Results
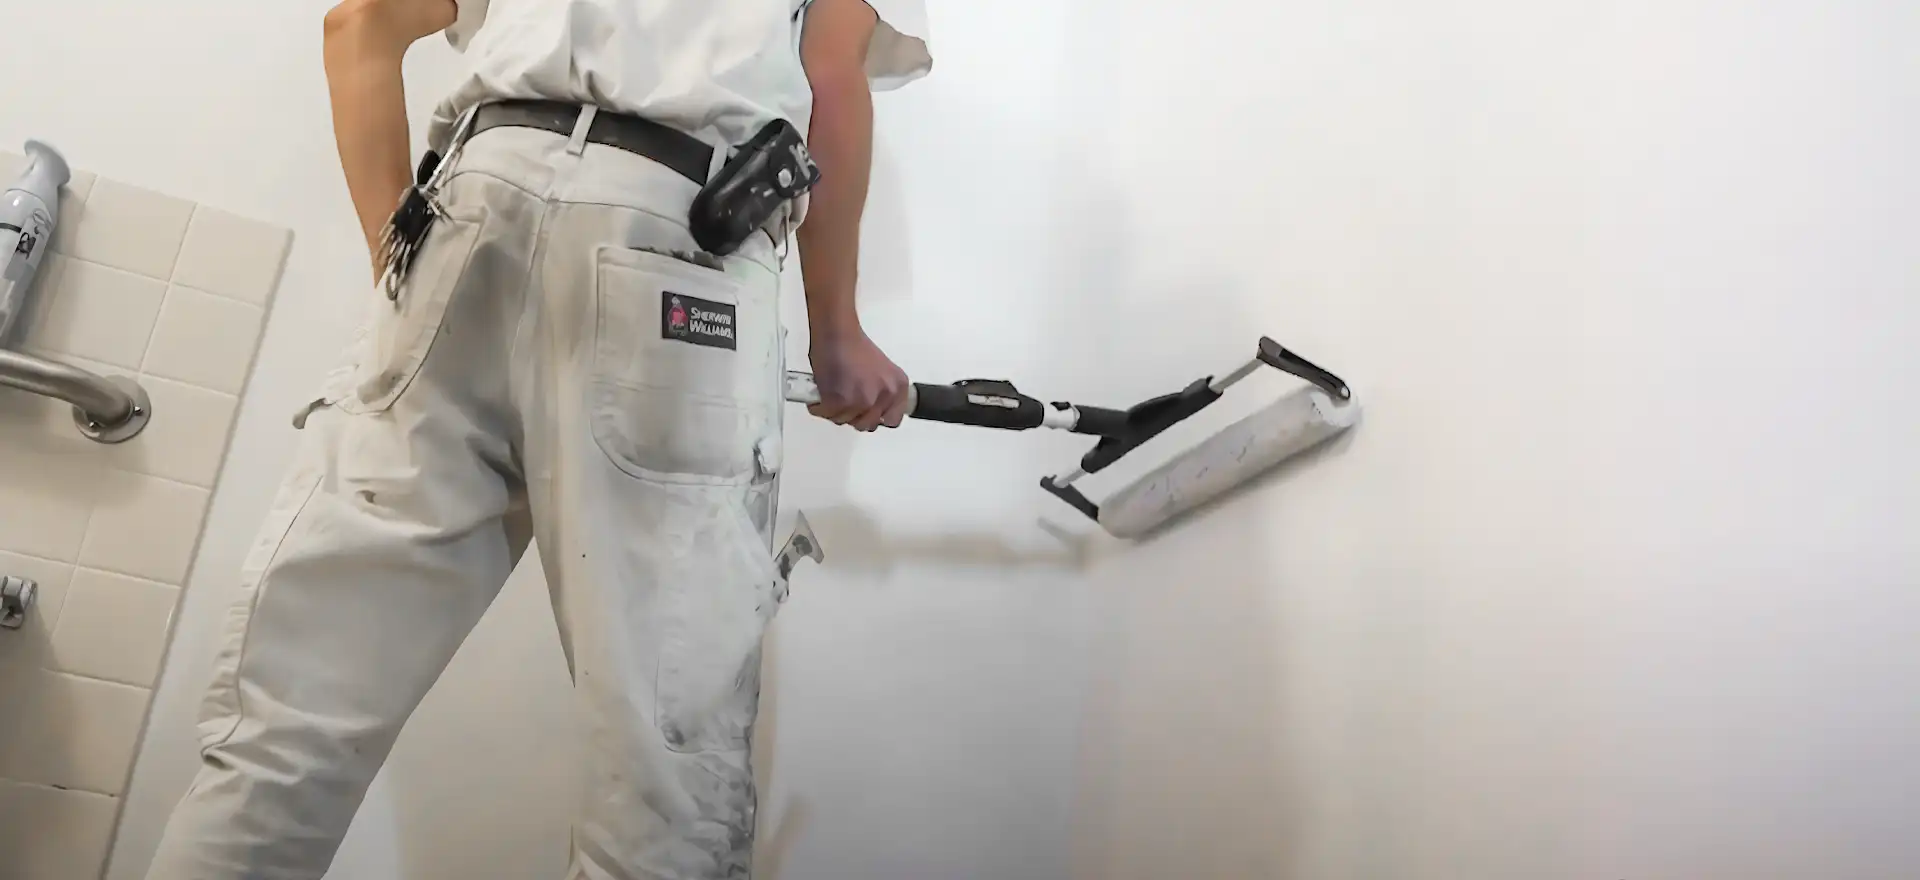
After years in the business, I’ve developed some foolproof techniques that I’m excited to share:
Roller Techniques: Avoid Lap Marks Like the Pros
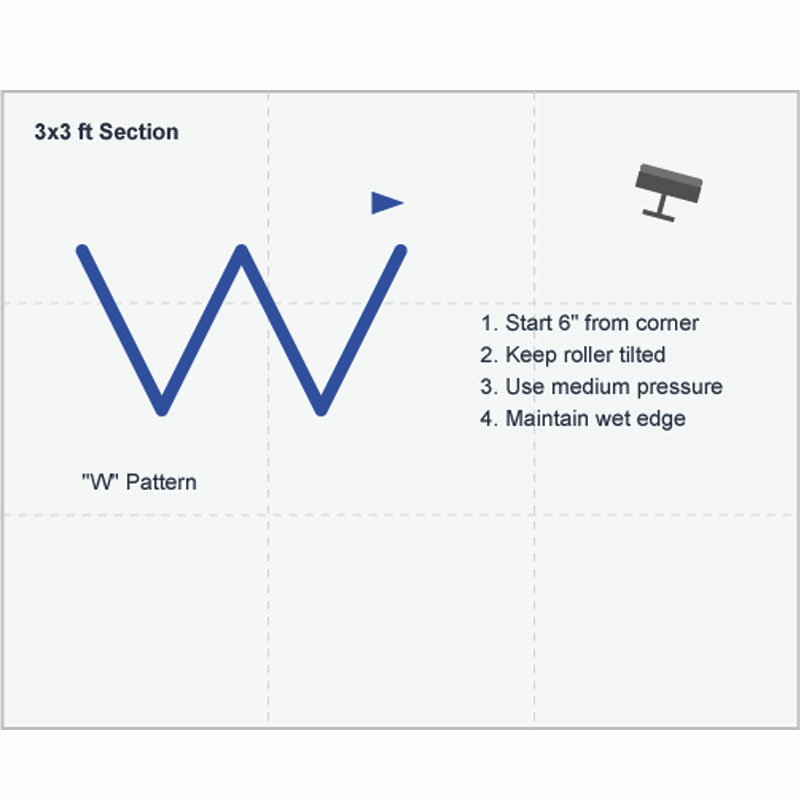
You might have heard about the “W” technique, but after thousands of room paintings, I can tell you there’s more to it than just making a letter shape. Here’s how to do it like a pro: First, mentally divide your wall into 3×3 foot sections – this is your working area for each “W”. Start about 6 inches from the corner of your wall, and roll your loaded roller in a 3-foot “W” pattern, then fill it in without lifting the roller.
Here are the secrets that most DIYers miss:
- Keep the roller slightly tilted throughout the process – this prevents those annoying roller lines that scream “amateur job!”
- Use light to medium pressure – I’ve seen countless homeowners press too hard, trying to squeeze out more paint. Trust me, this only leads to uneven coverage and roller marks. Let the roller and the paint do the work.
- Maintain consistent speed – too fast creates spatters, too slow leaves lap marks. I usually count “one-two” in my head for each stroke to keep my pace steady.
- Always overlap your previous “W” by about 6 inches while the paint is still wet. This is crucial for blending and avoiding those dreaded lap marks.
Pro Tip: If you notice the paint starting to drag or the roller making a sticky sound, it’s time to reload – don’t try to stretch it! This is a mistake I see homeowners make all the time, and it always shows in the final result.
Want a way to check your work? Stand at an angle and look at the wall with light hitting it – if you see any “W” patterns in the dried paint, you need to adjust your technique. The goal is to have no visible pattern at all.
The Professional Painter’s Guide to Cutting In
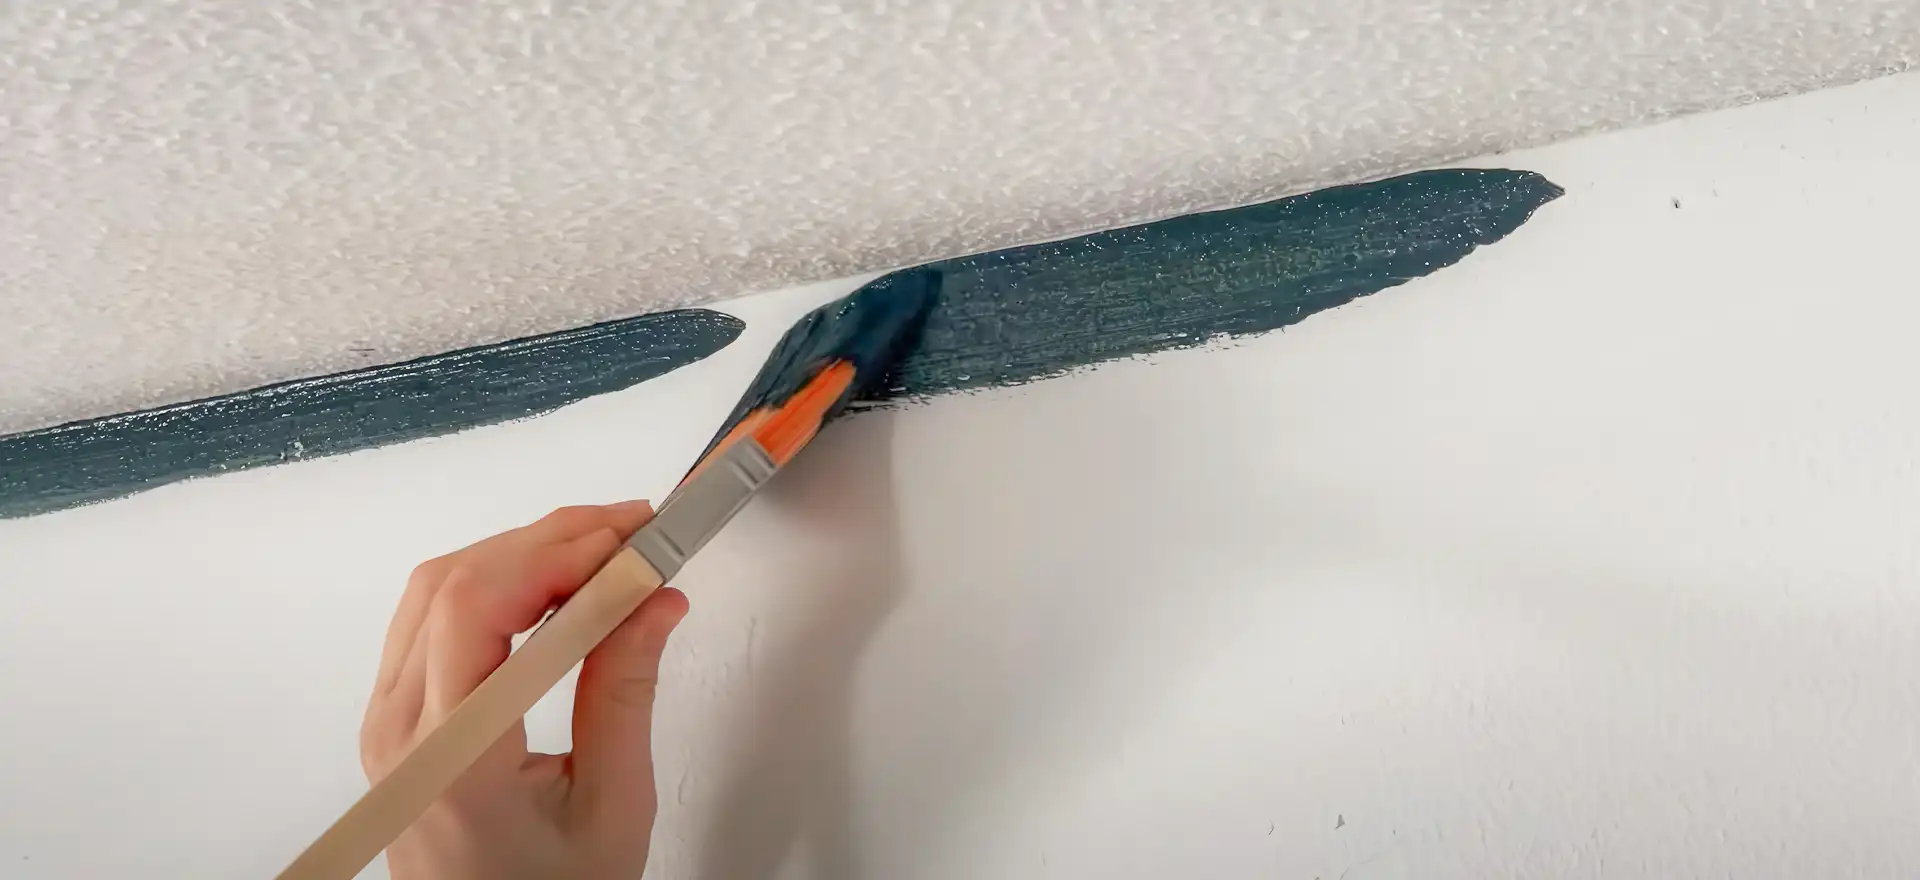
After seeing countless DIY projects, I can tell you that cutting in is where the pros really separate themselves from the amateurs. But don’t worry – I’ve developed a foolproof method over my 20+ years of painting that anyone can master with a little practice:
- Choose the Right Brush: I always use a 2.5-inch angled brush for most jobs. Here’s why: it’s wide enough to lay down enough paint but narrow enough to maintain control. Spend the extra few dollars on a quality brush – those cheap ones shed bristles and leave streaks that’ll drive you crazy.
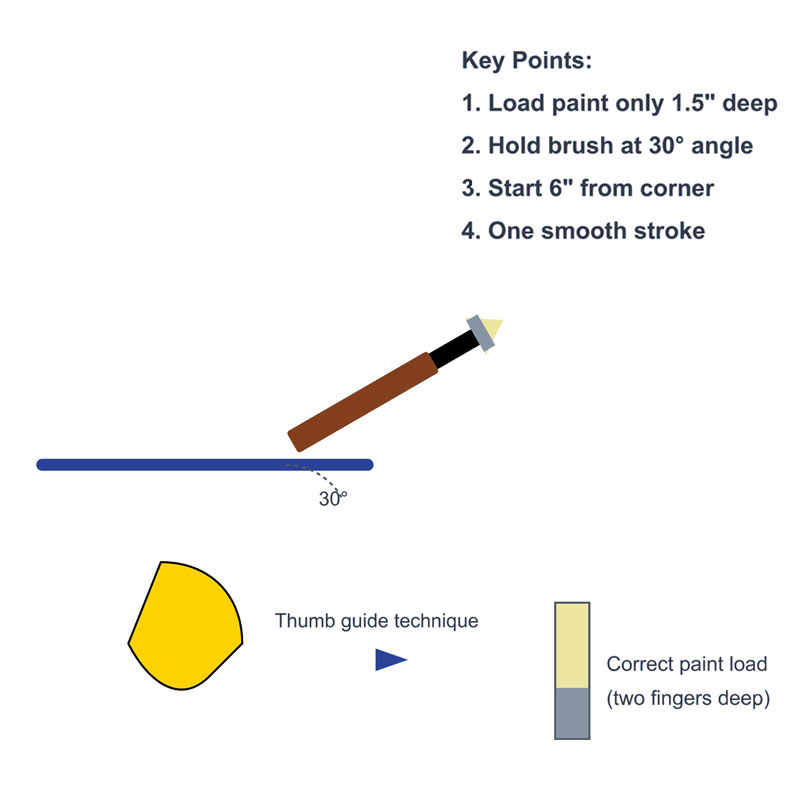
- The Perfect Load: Here’s a game-changing tip – load only the first 1.5 inches of the bristles with paint. When I train new painters, I tell them to mark their brush with painter’s tape at the 1.5-inch mark until they get the feel for it. And please, don’t overload! Dip just the tip – about “two fingers” deep is perfect. I can’t tell you how many ceiling drips I’ve had to fix because someone dunked their brush like it was a cookie in milk!
- The Setup Position: Start about 6 inches from your corner or edge. This gives you room to build up your momentum. Hold your brush like you’re holding a pencil – this gives you the most control.
- The Perfect Stroke: Here’s my secret technique that took years to perfect:
- Position your brush about 1/2 inch away from where you want your line
- Apply gentle pressure to fan out the bristles slightly
- Draw your line in one confident stroke, letting the natural angle of the brush do the work
- Keep your brush tilted at about 30 degrees throughout the stroke
Pro Tips from the Trenches:
- Before you start, slightly dampen your brush with water (then shake it out well). This prevents paint from drying in the bristles and gives you smoother lines.
- Always cut in before rolling the walls. I’ve seen folks try to roll first and then cut in – that’s asking for trouble!
- If you’re right-handed, cut in from left to right. Lefties, go right to left. This lets you see exactly where you’re going.
- Having trouble with straight lines? Here’s a trick I use with nervous first-timers: use your thumb on the adjacent surface (ceiling or wall) as a guide – instant straight line!
Remember: Cutting in is like learning to ride a bike – it might feel awkward at first, but once you get it, you’ll never forget it. Just take your time and focus on control rather than speed. The speed will come naturally with practice.
The Truth About Paint Quality: A Professional’s Perspective

Let me be frank: after watching countless homeowners struggle with cheap paint over my 20+ years in the business, I can tell you that skimping on paint quality is one of the most expensive mistakes you can make. Just last month, I had to rescue a homeowner who “saved” $100 buying budget paint, only to spend twice that amount buying more paint for extra coats – not to mention wasting an entire weekend of work.
Here’s what premium paint really gives you:
- Superior Coverage: Most premium paints cover in 2 coats max, while cheap paints often need 3-4 coats. Do the math: two gallons of quality paint at $70 each ($140) versus four gallons of cheap paint at $40 each ($160) – and that’s not counting your time and effort!
- Durability That Pays Off:
- Premium paints typically last 10+ years inside
- Better resistance to scratches and scuffs
- Won’t fade or yellow over time like budget paints
- Can handle regular cleaning without losing their finish
- Better Application Properties:
- Smoother flow off your brush and roller
- Less spattering (meaning less cleanup)
- Better leveling (fewer roller marks and brush strokes)
- More consistent drying time
- Time-Saving Features:
- Many premium paints now include primer (and yes, they actually work!)
- Better hide over existing colors
- More forgiving of minor application mistakes
- Easier touch-ups years later
Pro Tips for Paint Selection:
- Look for these key ingredients on the label:
- Higher percentage of solids (more actual paint, less water)
- Titanium dioxide (for better coverage)
- Acrylic latex (for better durability)
- Price ranges to expect (as of 2024):
- Premium: $65-90 per gallon
- Mid-grade: $40-60 per gallon
- Budget: Under $35 per gallon
- Remember: If you see paint under $25 per gallon, run!
- Best brands from my experience:
- For high-traffic areas: Benjamin Moore Regal Select/Aura or Sherwin-Williams Duration/Emerld
- For general use: Benjamin Moore Ben or Sherwin-Williams SuperPaint
- For budget-conscious but still quality: Behr Premium Plus
Here’s a money-saving tip that doesn’t compromise quality: Watch for sales at major paint retailers – they typically have 30-40% off premium lines during major holidays. That’s when I stock up for my own projects!
Remember: Paint is only about 15-20% of your total project cost (including supplies, time, etc.), but it’s responsible for 90% of the final look and longevity. Don’t let a small upfront saving cost you big in the long run.
Common Pitfalls and How to Avoid Them: Lessons from 20+ Years in the Field
After fixing countless DIY paint jobs gone wrong, I’ve seen every mistake in the book. Here are the most common pitfalls and, more importantly, how to avoid them:
Lap Marks: The Amateur’s Telltale Sign
Nothing screams “DIY job” louder than lap marks – those annoying stripes where two sections of paint overlap. Here’s how to prevent them:
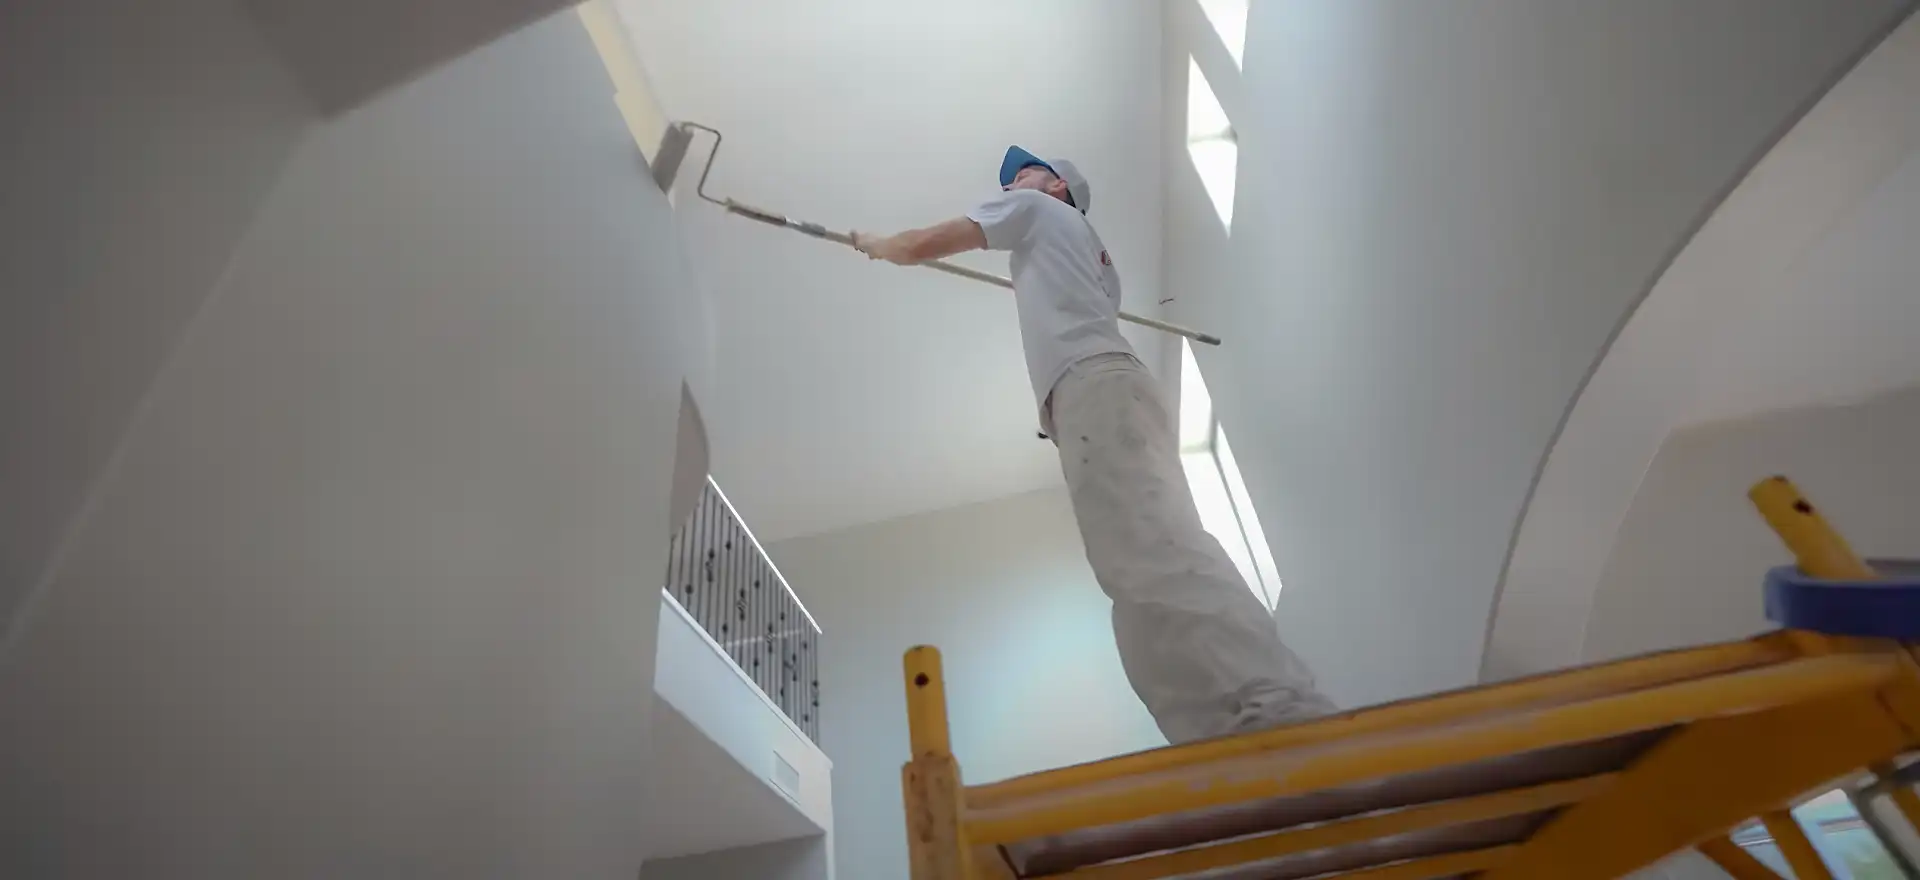
- Keep a “wet edge” at all times – don’t let paint dry before blending with the next section
- Work in sections no larger than 4 feet wide
- When reloading your roller, start back in the wet paint by about 6 inches
- Paint entire wall heights in one go – never stop halfway!
Pro Tip: In hot weather, add a paint extender to give yourself more working time.
The “Picture Frame” Effect
This happens when you cut in around the edges but wait too long to roll the walls. The cut-in areas dry differently, creating a visible border. Here’s my solution:
- Only cut in about 5-6 feet ahead of your rolling
- If possible, have someone roll while you cut in
- If working alone, cut in one wall, then immediately roll it before moving to the next
Pro Secret: Keep a spray bottle with water handy – a light mist on the cut-in edge helps blend if it’s starting to dry.
The Flashing Problem
“Flashing” occurs when patched areas show through the paint differently than the surrounding wall. My solution? Spot-prime every patched area before painting. Yes, it takes extra time, but it’s worth it for a professional finish.
The Paint Coverage Guessing Game
I can’t count how many times I’ve seen people run out of paint mid-wall or buy way too much. To calculate the required amount of paint for your project, you can use our paint calculator on the website, or calculate the required amount yourself:
- Measure correctly: Length × Height = Square Footage
- Subtract for doors/windows (a standard door is about 20 sq ft)
- One gallon typically covers 350-400 sq ft
- ALWAYS add 10% extra for touch-ups and mistakes
Pro Tip: Save your leftover paint properly sealed for future touch-ups.
Texture Inconsistencies
Different roller naps (I prefer wool blend roller covers) create different textures, leading to obvious patches:
- Use the same roller nap throughout the project
- For smooth walls: 3/8 inch nap
- For light texture: 1/2 inch nap
- For heavy texture: 3/4 inch nap
Pro Secret: Try not to use cheap cover rollers – may release lint onto the walls and cause splattering, while good quality rollers will provide a better finish. Write down the exact roller type you used – you’ll thank me when doing touch-ups later!
The “It’ll Dry Darker/Lighter” Trap
Paint doesn’t significantly change color when it dries, despite what many believe. If it looks too dark or light when wet, it’ll stay that way. My advice:
- Always test colors on a 2×2 ft sample area
- View it at different times of day
- Use actual paint, not just color cards
Pro Secret: Here’s something many people don’t consider: light affects color dramatically. I always recommend testing your color in three different spots:
- Near a window
- In a darker corner
- On an adjacent wall
Paint large sample squares (at least 2×2 feet) and observe them at different times of day. Paint your sample on a piece of white poster board – you can move it around the room to see how it looks in different spots.
Poor lighting while painting leads to missed spots and uneven coverage. My solution:
- Use a powerful work light (at least 2000 lumens)
- Position it at an angle to the wall to spot imperfections
- Check your work in both artificial and natural light
- Pro Tip: Keep a “mistake light” handy – a bright LED you can hold close to the wall at an angle
Pro Painters’ Equipment Essentials
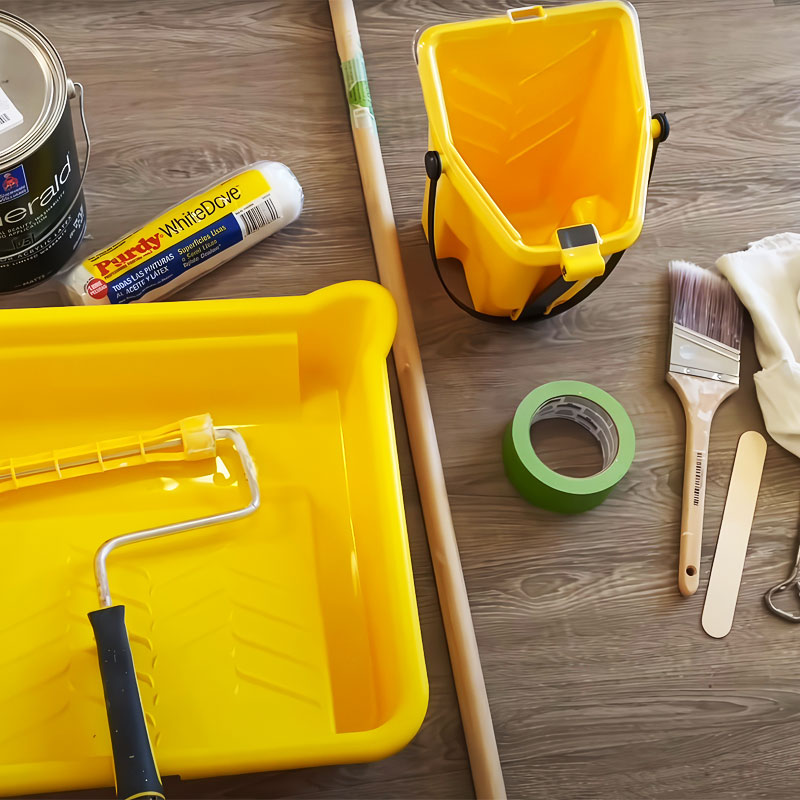
- Premium angled brush (2.5-inch)
- High-quality roller frame with smooth-rolling mechanism
- Roller covers
- Metal roller tray (plastic ones tip too easily)
- Canvas drop cloths
- Blue painter’s tape
- Dripless caulk gun
- 5-in-1 painter’s tool
- Extension pole with quick-lock mechanism
- Paint stirrer that attaches to your drill
- HANDy Paint Pail for cutting in
Clean-Up Secrets
The mark of a true professional isn’t just in the painting – it’s in the clean-up too. Clean tools immediately after use – dried paint is your enemy. Here’s my end-of-job routine:
- Brush Care: Clean brushes thoroughly with warm water and mild soap, shape them, and store them in their original covers or heavy paper wrapped in a cone shape.
- Roller Covers: Instead of throwing them away after one use (a common mistake), wrap them tightly in plastic wrap between coats. For final cleaning, use a roller cleaner tool – it pays for itself in saved roller covers.
- Paint Storage: Pour a thin layer of water on top of latex paint before sealing the can, store it upside down, and keep it in a temperature-controlled environment.
Pro Tip: A wire brush comb is worth its weight in gold for cleaning brushes properly. Never wash rollers and brushes in your sink – use a 5-gallon bucket outside.
Final Thoughts
Remember, professional-looking results come from professional-level preparation and attention to detail. Take your time, focus on the basics, and don’t rush the process. The satisfaction of stepping back and seeing perfectly painted walls is worth every minute of careful work.
Whether you’re doing your first room or your fiftieth, these tips will help you achieve results you’ll be proud of. Remember: painting isn’t just about changing colors – it’s about transforming spaces and creating environments that people will live in and enjoy for years to come. Take pride in your work, and it will show in the results.
And if you run into trouble? Don’t hesitate to call in a professional. Sometimes the smartest decision is knowing when to call in an expert. Our painting company offers affordable painting services in Magnolia and the surrounding areas and is ready to help you with any project.
